Toggle Nav

Dave Coster How To - Tie A Pole Rig
STEP 1
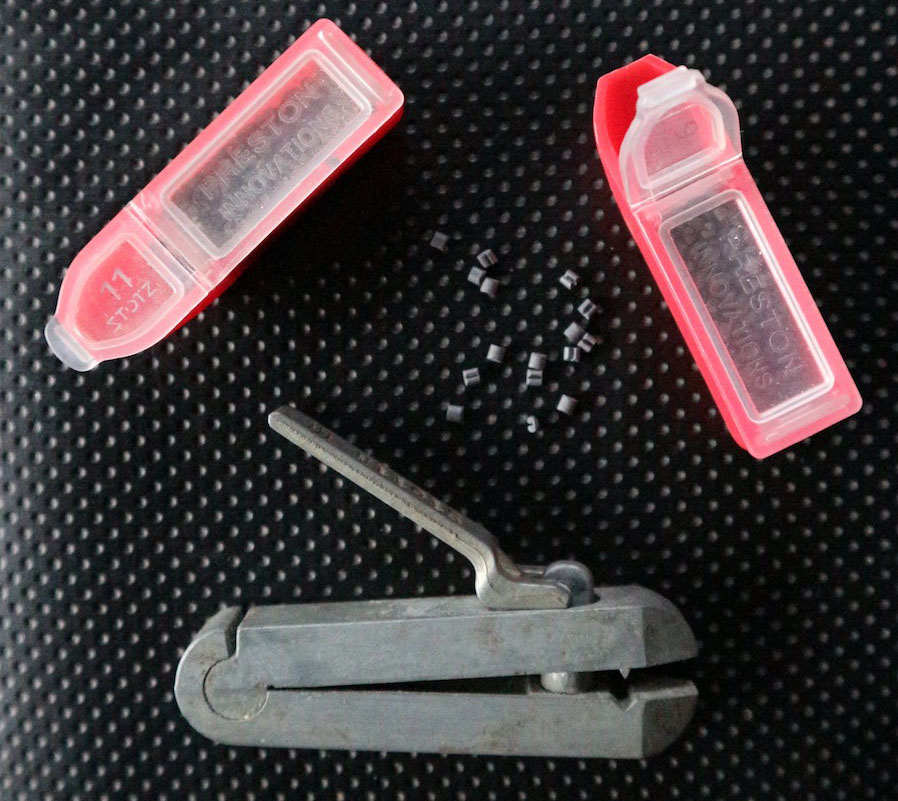
The first step in making pole rigs an easier job is to use Stotz weights instead of micro shot. Round micro shot are fiddly to fix to line, while elongated Stotz weights are far less hassle and a lot quicker to apply. All you need to do is spill a few weights onto a flat surface and pick up the ones with their slots facing downwards - with Preston’s Stotta tool. The tiny weights can then be nipped on the line after a pole float has been installed.
STEP 2
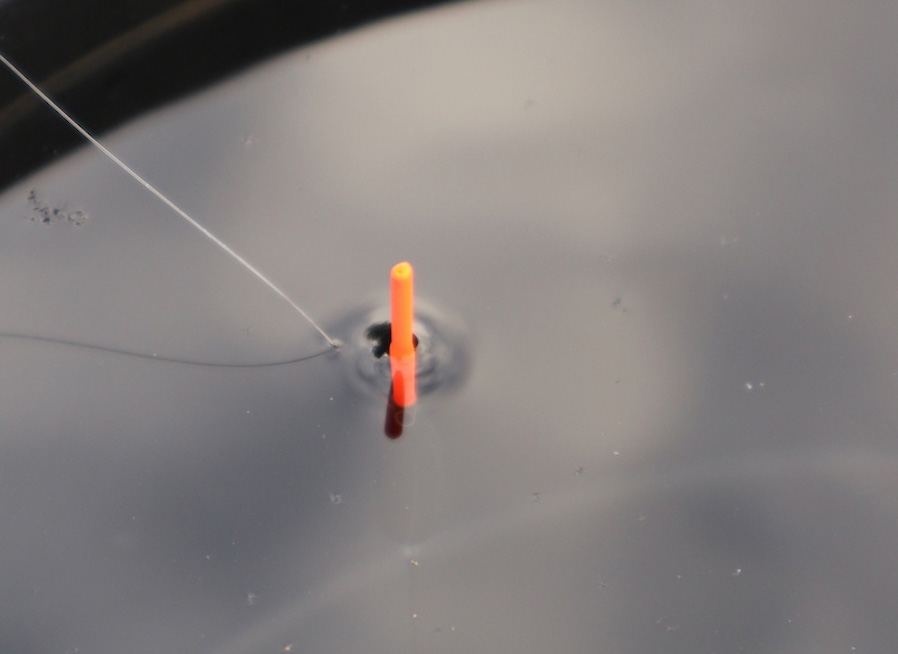
I use a bucket of water to weight my pole floats correctly, fixing larger Stotz weights directly underneath the float first, which will become the main bulk the float carries. Once the float is weighted down to a point where just its shoulder and sight tip are showing, I then add smaller dropper shot below, dotting the float down so just the bright tip part is left showing above the surface. In this instance, the float I am tackling up takes 3 number 9 and 3 number 11 Stotz weights, which is perfect for shallow to medium depths.
STEP 3
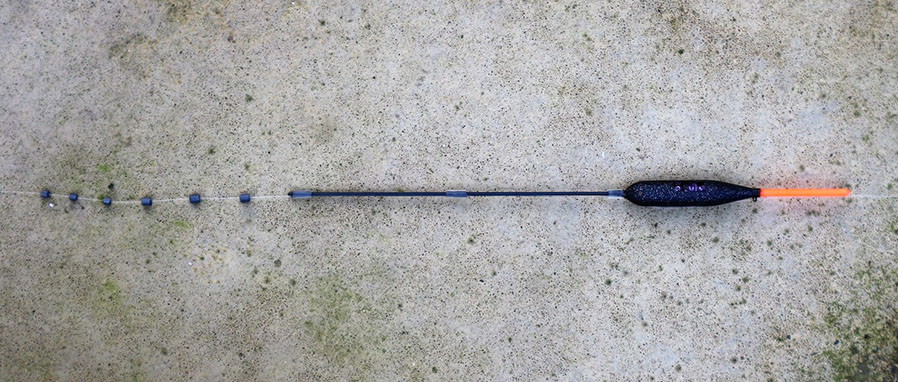
Now I know exactly what weights the float takes, I strip off the smaller number 11 droppers and tie a loop in the main line. I then add a slightly less strong hook length (loop to loop style) and put back the 3 number 11s on this, spreading them out evenly. Normally my hook lengths are 14 to 16 inches long, so the smaller spread out shot help the hook bait to fall in a natural manner when the rig is in working mode.
As for the larger Stotz weights on the main line, there are several ways these can be positioned. I like to start with them slightly spaced apart, directly above the hook length. I then have options of grouping them tighter together if fish are feeding on the bottom, or spreading them out more if bites are coming higher up in the water.
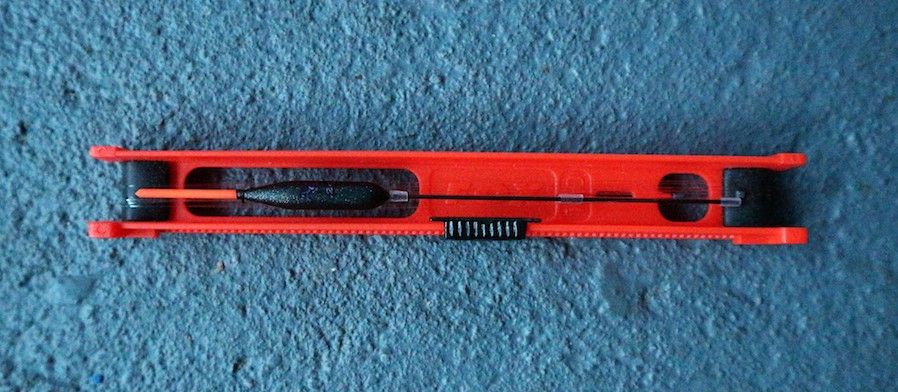
STEP 4
The rig is finished off by tying on a hook and then the whole tackle is stored on a pole winder. I like to use winders that are only a fraction longer than the float, because the shorter the winder, the less space that’s taken up in the drawers and trays in my seat box! A good tip here is not to stretch the finished rig onto the winder too tightly, otherwise the line tends to take on some memory, which can affect the way the tackle performs. Winders with sliding anchor pins on their sides are best in my opinion, such as the Matrix and Preston designs. These are less fiddly than using rubber pole winder anchors, which are too easy to lose in my experience.
STEP 5
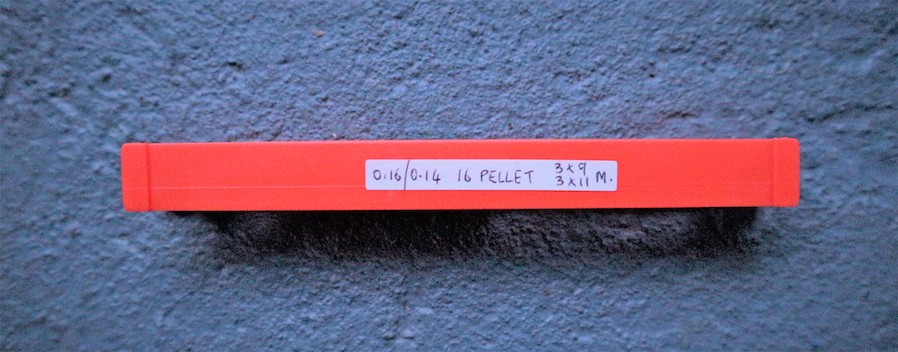
Once a pole rig is finished and neatly stored on a winder, I position a sticky label on one side. On this I write important information, such as line strengths, hook size and type, plus the amount and size of Stotz weights the float is carrying. It’s useful to know the number and size of weights on the hook length in particular, because if this is ever lost, you know what’s needed to get the rig back working again. I also add a depth code at the end of the information sticker to let me know what length the rig is. I use an “S” for shallow rigs, “M” for medium depth rigs and “D” for deep or extra-long tackles.
All the bits and pieces I use for making up my pole rigs are sold in Angling Direct stores by the way.