Toggle Nav

A Beginner's Guide - How to Use Pole Elastic
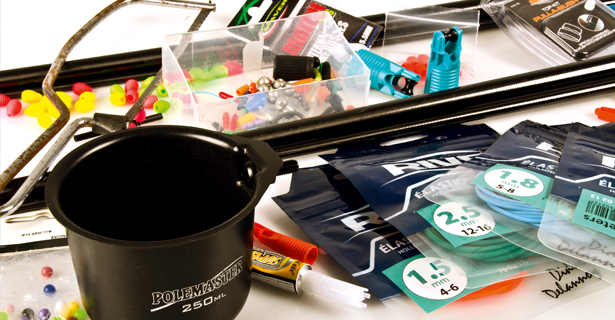
Elasticating a pole and pole elastic in general are confusing areas of angling. You can always pop yourself down to a tackle shop, or contact the AD team with your tackle queries. As a novice angler, you’ll see a myriad of bungs, puller kits, winder bungs, bushes and other exotic-sounding components, when it comes to pole fishing, but fear not, things will become a lot clearer after you’ve read our guide to all things elastic.
What is Pole Elastic?
Used in match and coarse fishing, pole elastic gives anglers flexibility when hooking fish depending on the rating, type and technique used. Some anglers like to double up strands of elastic, some change the ratings. It is important to consider the season and the fish you are targeting when selecting the right one for you.
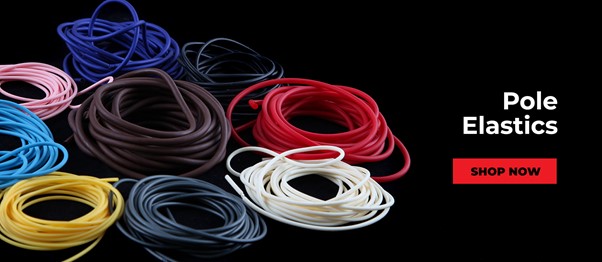
Types of Fishing Pole Elastic
There are a few types of pole elastic to look out for, the main difference being solid and hollow.
Solid Elastic
Light and heavy solid elastics are cheap to get hold of but may not last as long as the more-expensive hollow elastics.
- Solid Elastic – Light: Rated between No3 and No8, light solid elastics are perfect for natural waters for smaller fish like roach and skimmers. Back in the day, No8 elastic was the heaviest you could buy, but now you can get your hands on ratings more than double this.
- Solid Elastic – Heavy: Heavy solid elastic is rated between a No8 and No20 strength and will ‘power-up’ quickly to tame bigger fish like carp and chub. It’s a good elastic to use when fishing against snags, for example when you’re targeting canal chub or big carp.
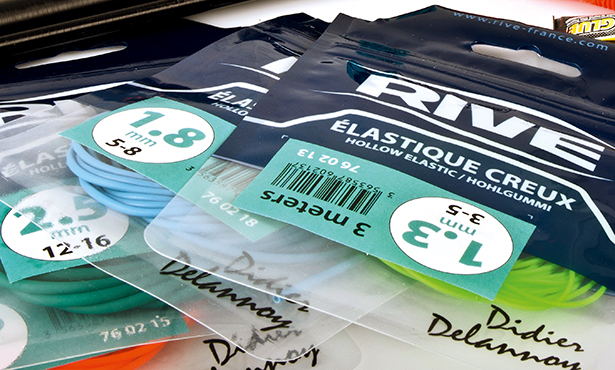
Hollow Elastic
Hollow elastic has more stretch than solid elastic and is a lot softer for the same strength. It also comes in a wider range of ratings, meaning one elastic can cover you for a multitude of situations. Hollow elastic tends to be better quality than solid and will therefore last longer.
- Hollow Elastic – Light: Rated 1-5. Ideal for mixed fish, it’s so stretchy you can land small fish but if you do hook into a large fish all is not lost.
- Hollow Elastic – Medium: Rated 6-12. Perfect for general commercial use when fishing for F1s and carp.
- Hollow Elastic – Large: Rated 12 plus. Designed for taming big fish, it’s ideal for fishing down the edge on commercials and for rivers when targeting chub and barbel. A really stretchy elastic that will soon sap the power of a large fish.
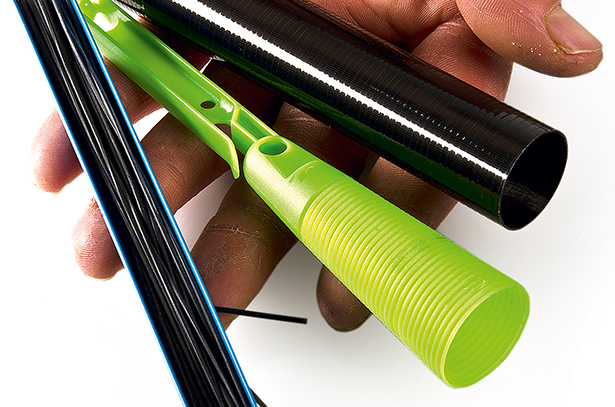
What are Winder Bungs?
Winder Bungs are designed for Light Elastics and are great for small sizes of light, solid elastic as you can store some elastic on the winder part, allowing you to slacken or strengthen its tension. You can also cut some of the elastic off the connector end when it starts to wear and then unwind off the winder to re-tension correctly.
3 Ways Of Connecting Pole Elastic
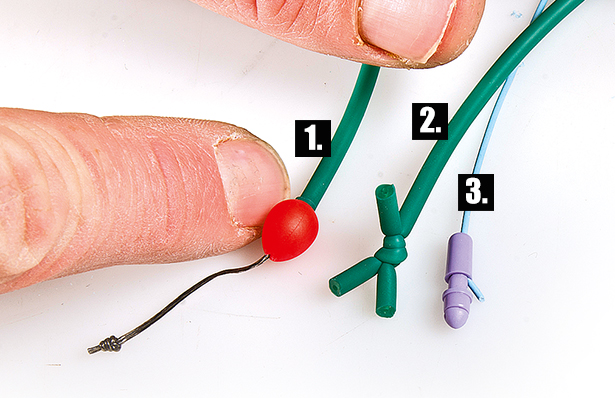
1) Dacron: Lasso your rig to a Dacron connector and the Dacron helps to keep your line away from your pole tip, meaning you’ll avoid tangles.
2) Crow’s Foot: You simply tie a loop in the elastic here, meaning it’s very simple to set up. It’s very direct – to attach you simply lasso with your rig.
3) Plastic Connector: A popular choice, it’s simple and easy to use.
How to Fit Fishing Pole Elastic
In this part of our Beginner's Guide, we will be showing each step to elasticating your fishing pole. If you find it easier, you can also watch the same steps in the QuickBite video below.
Step-By-Step Guide to Elasticating a Fishing Pole
This Guide was originally seen in: 
Step 1: Fit the bush. Match the size of bush to your elastic and always use a slightly bigger one. The bush acts as a buffer between your pole and elastic.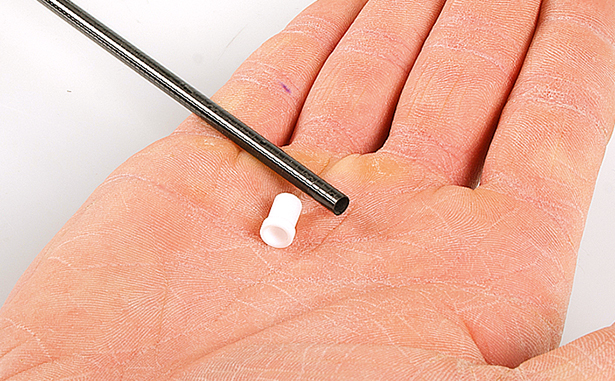
Step 2: Line up the bush against the pole and cut where they are of equal diameter. Always err on the side of caution and cut little at a time.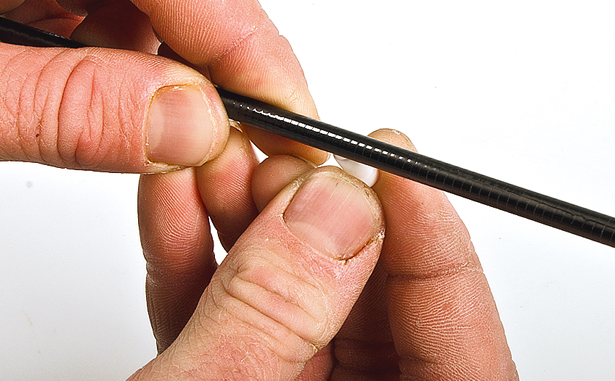
Step 3: Cut your pole back with a sharp, thin hacksaw blade and saw in one direction for smoothness.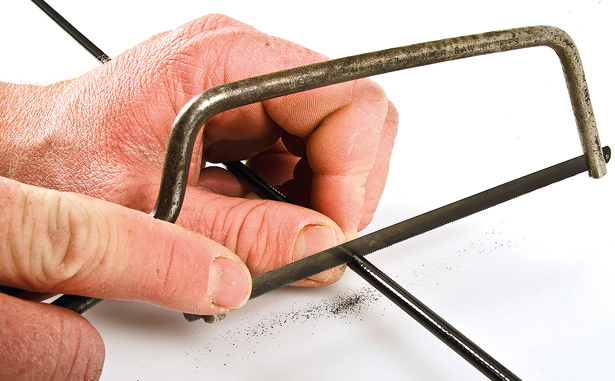
Step 4: Sand down with fine sandpaper.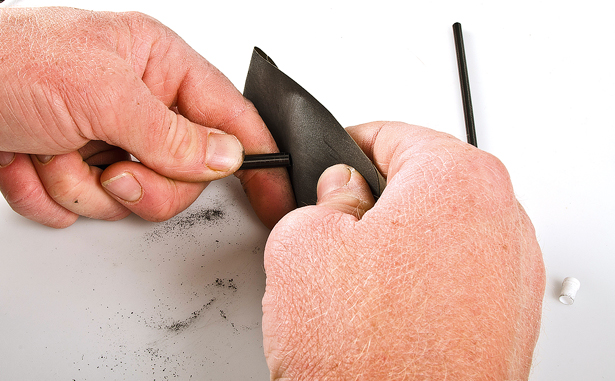
Step 5: Slot in your bush and add a dab of superglue if you want a little extra security.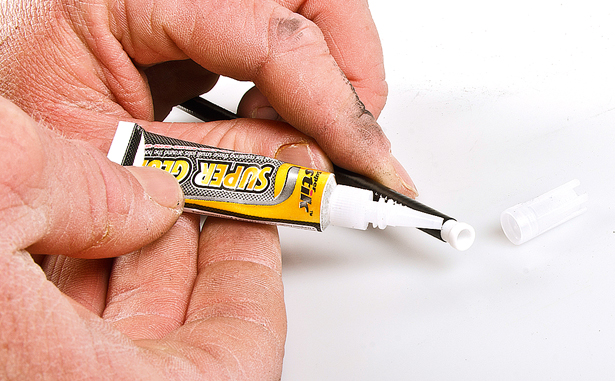
Step 6: Fit your bung into the bottom of the pole; again, cut a little at a time until it fits.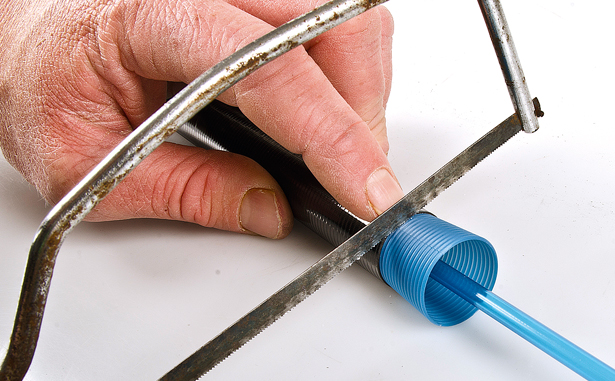
Step 7: Trim with scissors for a perfect fit.
Step 8: The bush should poke out of the end of the pole, like so.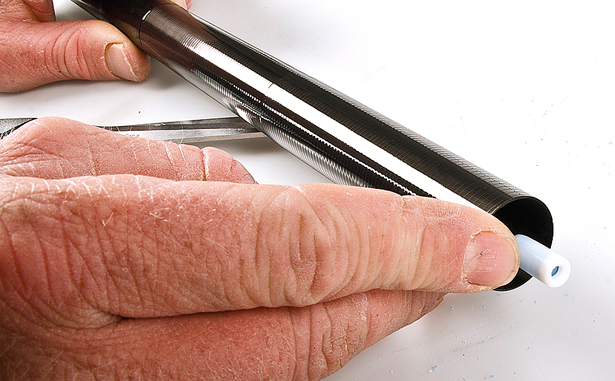
Step 9: Put your pole threader through your pole.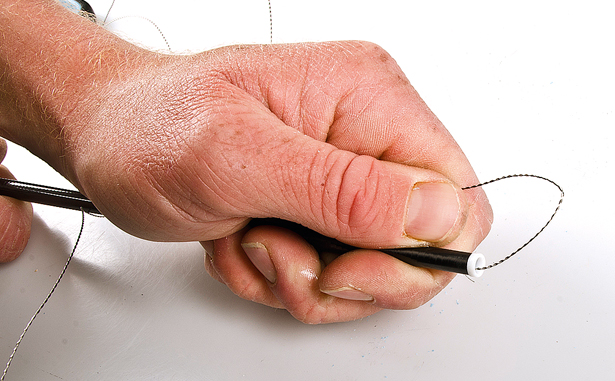
Step 10: Push your elastic through the threader eye and then pull through the pole.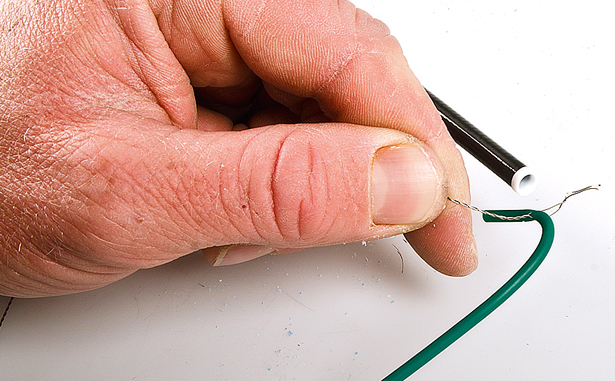
Step 11: Pull the elastic through the puller bung.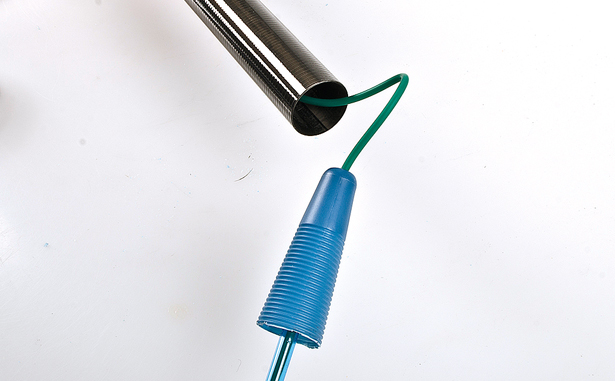
Step 12: Slide a bead onto the elastic.
Step 13: Tie a loop in the elastic and cut off the loose ends; the knot will stop everything pulling through.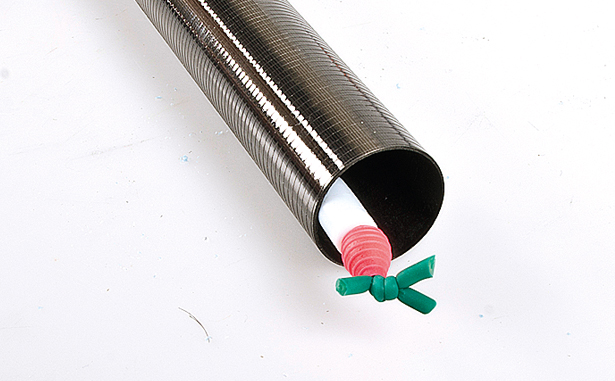
Step 14: At the top end of the pole slide a connector onto your elastic, in this case, a Dacron.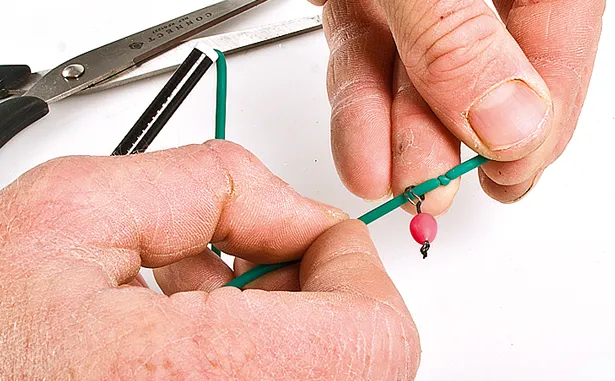
Step 15: Tie a knot in your elastic and ‘lasso’ your connector up against the knot, then push the bead back down.
Step 16: Almost there! Just before you go fishing make sure you pull a fair amount of elastic out of your pole to soften it up; if it goes saggy take a little more elastic off at the bottom end.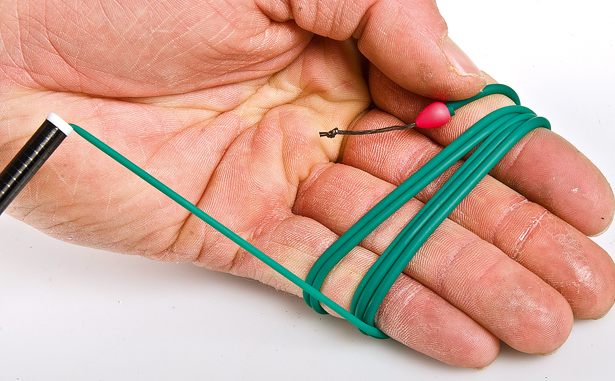
There you have it! Elasticating your pole in 16 easy steps! We hope you found this guide useful. If you want to check out more of our beginner guides, read the AD Blog or watch a how-to tutorial over on ADTV. For updates, follow our social media.